


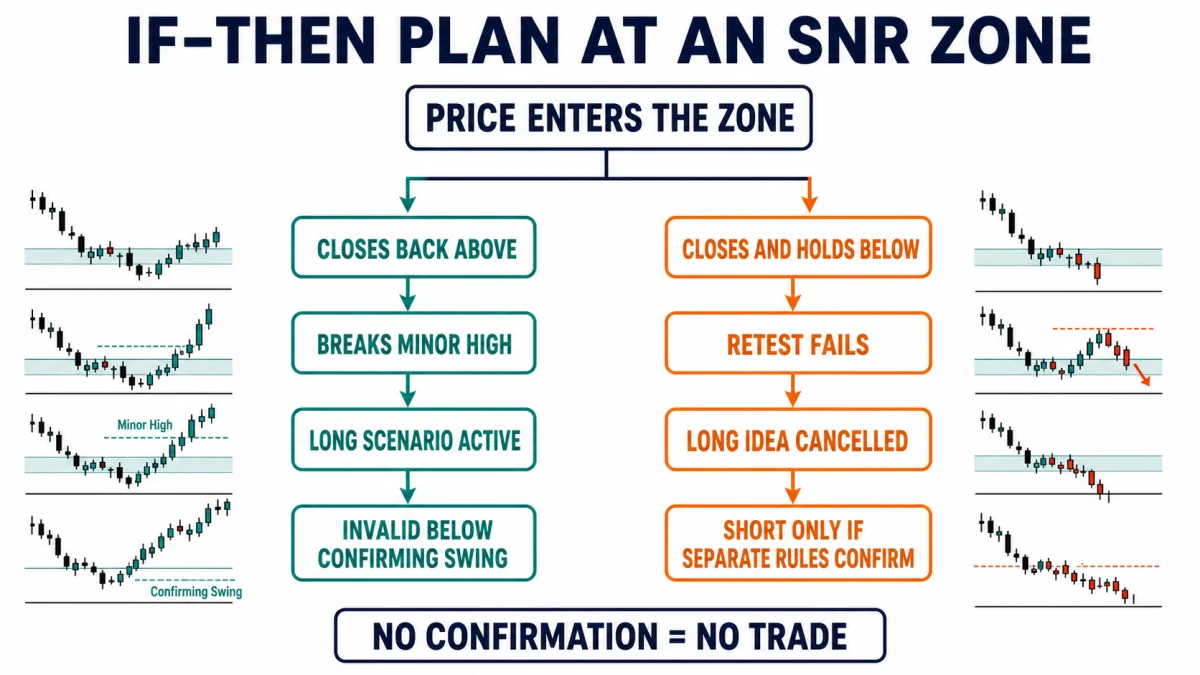
An Alchemist if–then trading plan converts a directional opinion into conditional decisions. “If” describes an observable market event; “then” describes the permitted response. A complete plan normally includes a bullish scenario, a bearish scenario, and a no-trade condition. For example: if price closes back above support and breaks a minor swing high, then a long setup may be evaluated; if price closes and holds below support, then the long idea is cancelled. The framework does not force an opposite trade. Its purpose is to define evidence, invalidation, and inaction before emotion and hindsight influence the decision.
Key takeaways
- An if–then plan describes conditions, not predictions.
- Each branch needs its own trigger and invalidation.
- Cancelling a long does not automatically create a short.
- The no-trade branch is an active risk decision.
- Rules must be written before price reaches the decision area.
Why conditional planning is different from forecasting
A forecast says what the trader expects. A conditional plan says what must be observed before action is allowed. Forecasts can be useful for organizing attention, but they become dangerous when the trader protects the prediction instead of responding to price.
The Alchemist framework starts with storyline and POI. The if–then plan expands the trigger stage into multiple branches. It asks not only “What confirms my idea?” but also “What cancels it?” and “What would make me wait?” Use the market-structure guide to define the swing event inside each branch.
Keep the language neutral. Replace “price will bounce” with “if H1 closes back above the zone and a later candle holds above, the reclaim branch becomes valid.” The second statement can be checked by another reviewer.
How to write a useful if clause and then clause
The if clause must name a completed event: candle body closes, swing breaks, retest holds, or zone is invalidated. “If price looks strong” is not testable. Specify the timeframe because an M5 close and an H1 close are not equivalent.
The then clause should state permission rather than certainty. “Then evaluate a long entry at the retest” is safer and more accurate than “then buy because price will rise.” The clause may also say wait, cancel, reduce size, or skip.
Pair every active branch with invalidation and the next obstacle. If the trigger occurs after price has already moved into the next resistance, the scenario may be technically valid but no longer executable under the original risk plan.
Three branches: bullish, bearish and no trade
A two-direction plan should not become two simultaneous predictions. The bullish branch may require a reclaim and higher low. The bearish branch may require acceptance below and a failed retest. Until one branch completes, both remain hypotheses. The breakout-versus-fakeout framework can help keep those branch definitions distinct.
The no-trade branch covers overlap and poor execution: price oscillates around the zone, the trigger candle is too extended, the structure is contradictory, or the next obstacle is too close. Write these cases explicitly. Otherwise, “wait” often disappears once the market becomes active.
Use the guide to wick-versus-close invalidation to define whether a wick, body close, or hold beyond the boundary matters in your model. Do not switch the definition after seeing the candle.
Step-by-step workflow
- Mark the context timeframe and one decision zone.
- Write the bullish if clause using a completed event.
- Write the bullish then clause, invalidation, and obstacle.
- Write an independent bearish branch.
- Add at least one no-trade condition.
- Set alerts and stop editing the rules before price arrives.
- When a branch activates, recalculate size and execution feasibility.
- Review the original plan against candle-by-candle evidence.
Example if–then branches at support
| Branch | If | Then | Invalidation |
|---|---|---|---|
| Bullish | H1 closes back above and breaks minor high | Evaluate retest entry | Close below confirming swing |
| Bearish | H1 closes below and retest fails | Evaluate separate short plan | Close back above failed retest |
| No trade | Price overlaps zone repeatedly | Wait for new structure | Not applicable |
| Skip | Trigger is extended into obstacle | Record valid but untradeable | Not applicable |
These are example definitions, not trade signals. Your rules must be tested for the instrument and timeframe.
Worked chart scenario
Assume H4 price approaches a former resistance area now being tested as support. Before the test, the bullish branch requires an H1 close back above the zone followed by a break of the latest minor high. The bearish branch requires an H1 close below and a failed retest from underneath.
Price first wicks below but closes inside the zone. Neither branch is active. The next candle closes above, but the minor high remains intact. The plan still says wait. A third candle breaks the minor high; only now can the long branch be evaluated.
If the breakout candle is unusually large and reaches the next resistance, the plan may classify the setup as valid but untradeable. This is not a missed opportunity. It is the no-trade branch protecting the original risk assumptions.
Use scenarios during live execution
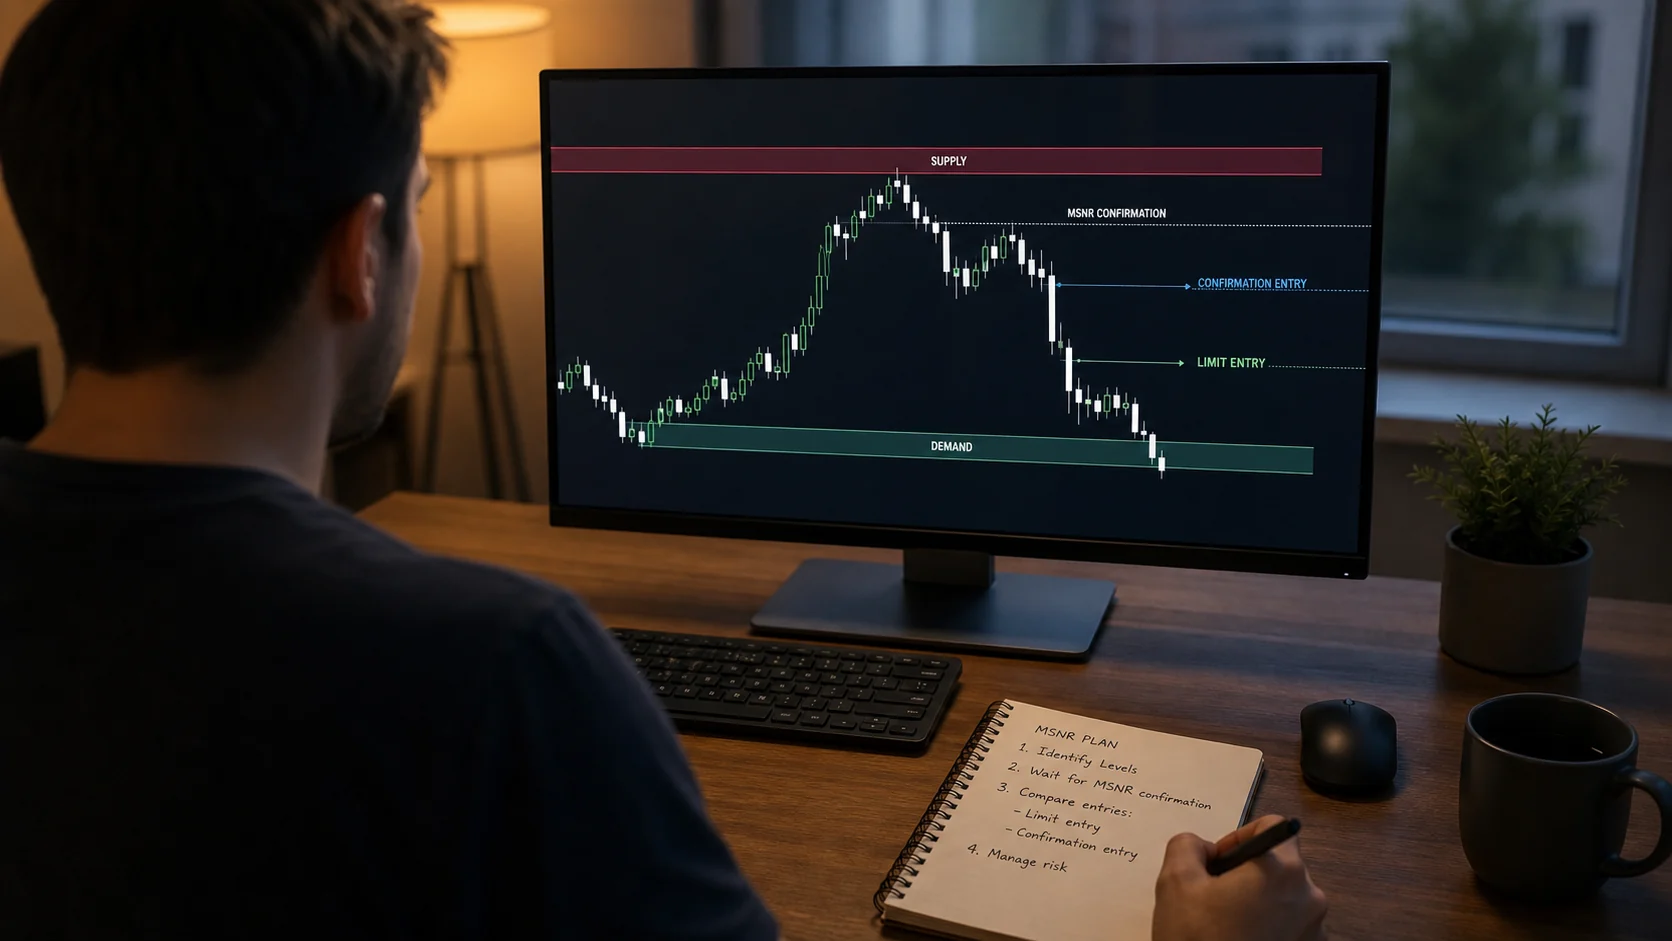
Place alerts at the POI rather than watching every candle. When an alert fires, read the written branches without editing them. If no branch is complete, do nothing. The plan should reduce decisions during the fastest part of the move.
If one branch activates, recalculate the actual stop distance and next obstacle. The chart may have changed since preparation. A valid technical event can still be skipped because the practical risk is now unsuitable.
After the session, compare the chart with the original text. Grade whether the condition occurred, not whether the market later moved in the preferred direction. This prevents outcome bias.
Common mistakes
- Using vague conditions such as strong or weak.
- Writing only the preferred branch.
- Treating long cancellation as an automatic short.
- Changing timeframe when a condition fails.
- Entering before the candle closes.
- Ignoring the no-trade branch after an alert.
A useful plan can be read quickly under pressure. If the branch needs several paragraphs of interpretation, simplify the observable condition.
Risk management and invalidation
Each branch needs independent invalidation. The bearish stop is not automatically the mirror image of the bullish stop. Define the structure that supports each thesis, then calculate exposure from the relevant distance. If both branches share one arbitrary pip stop, the plan is not truly conditional.
A technical location never determines position size by itself. First define the price behavior that proves the scenario wrong, measure the distance to that point, and only then apply the position-sizing formula. The risk–reward ratio is a planning constraint, not evidence that price is likely to reach the target. If coherent invalidation is too far for the permitted risk, reduce size or skip the trade.
Execution can differ from the chart. Spread, slippage, gaps, news, data-feed differences, and order type can change the result. The CFTC warns that leverage amplifies both gains and losses and that OTC forex customers trade through a dealer-controlled platform. A valid observation can still lead to a losing trade or poor fill.
Pre-trade checklist
- Both directional branches exist.
- No-trade cases are written.
- Every if clause names timeframe and completed event.
- Every active branch has invalidation.
- The next obstacle leaves usable space.
- Actual costs and stop distance are recalculated.
How to test the method without hindsight
Backtest the branch logic without knowing which path wins. Freeze the chart before the zone test, write all branches, then advance one candle at a time.
- Select one recurring setup.
- Hide future candles.
- Write bullish, bearish, and no-trade conditions.
- Advance candle by candle.
- Record which branch activated first.
- Measure rule compliance and execution costs separately.
Save one screenshot before the decision point and another after the scenario is complete. Record the instrument, session, timeframe, data feed, context, zone definition, trigger, invalidation, next obstacle, spread, slippage, maximum adverse excursion, maximum favorable excursion, and whether the order could realistically have been filled. Keep failed and ambiguous examples; deleting them creates survivorship bias.
Score process separately from outcome. A profitable trade outside the written rules is poor process, while a losing trade that followed a tested plan can remain a valid sample. Use the same definitions for at least 30–50 examples before changing a rule. When a rule changes, date the revision and begin a separate dataset.
When to stand aside
Stand aside when both branches appear active only because their definitions overlap. For example, a wick above and a close below may satisfy two vague rules. Tighten the conditions before collecting more samples.
Do not execute when the trigger appears during abnormal spread, a major scheduled release, or after the assumed stop has widened beyond the risk limit. Conditional planning includes practical execution conditions.
Frequently asked questions
Do I need exactly two scenarios?
At minimum, write the preferred branch, the failure branch, and a no-trade condition. More branches are useful only when they remain clear.
Can I change the plan during the session?
Only if your process explicitly allows a documented reassessment after new higher-timeframe information. Do not rewrite a failed branch to protect the original view.
Is a wick enough to activate a branch?
Only if a wick-based rule was defined and tested in advance.
What if no scenario happens?
Record no trade. Inaction is a valid outcome.
Should the opposite branch use the same position size?
No. Size depends on that branch’s own invalidation distance and risk limit.
Conclusion
An Alchemist if–then plan replaces the need to be right with the need to observe. Write both directions, define no trade, wait for completed evidence, and let invalidation cancel the scenario without argument.
Sources and methodology limits
- CME Group — Technical Analysis, accessed August 2, 2026.
- CME Group — Support and Resistance, accessed August 2, 2026.
- CFTC — Eight Things You Should Know Before Trading Forex, accessed August 2, 2026.
The if–then format is an editorial planning method, not a claim that the Alchemist label has an official definition or verified performance. Sources support the underlying chart and risk concepts.
Affiliate disclosure: If you need a practice environment, you may review an Exness demo account. This is a sponsored affiliate link, and Học Làm Trader may receive a commission if you register. The link is not a recommendation to open an account. Check costs, product terms, legal availability in your jurisdiction, and suitability before using any service.
Risk warning: This article is for education and general information only. It is not investment advice, a trade signal, or an invitation to trade. Technical analysis is interpretive and can fail without warning. Leveraged trading can cause rapid losses, and past performance does not guarantee future results. Test every rule independently, include realistic costs, assess your ability to bear loss, and take responsibility for your decisions.
Related reading: Alchemist POI Selection: Location, Freshness and Risk