


The Alchemist trading framework is best understood as a planning sequence rather than a standardized indicator or a guaranteed strategy. In this article, the term describes four questions: What is price doing? Where is a meaningful point of interest (POI)? What observable event confirms the scenario? What price behavior invalidates it? The framework moves from storyline to location, then from confirmation to execution. It does not predict the next candle. Its value is that a trader can write the same questions before every session, compare the plan with what actually happened, and separate chart interpretation from risk decisions.
Key takeaways
- Alchemist is used here as a practitioner framework, not an industry standard.
- Storyline describes current structure; it is not a directional certainty.
- A POI is a place to observe, not an automatic entry.
- A trigger must be visible and defined before the outcome.
- Invalidation belongs to the thesis; position size belongs to the risk plan.
What the Alchemist framework means here
There is no single regulator, exchange, academic body, or platform that defines an official “Alchemist” trading method. Different communities may use the label differently. To avoid false authority, this guide uses the name only for a repeatable chart-reading structure: storyline, POI, trigger, and invalidation. If your course uses other rules, test those rules separately rather than assuming the labels are interchangeable.
The sequence builds on familiar technical-analysis entities. CME Group describes technical analysis as interpretation of price charts and notes that it is an art rather than a science. Support and resistance are areas where price may pause or change direction, but CME also warns that they are zones and do not always hold to the penny. That uncertainty is why the framework needs conditions and failure rules.
Before using this workflow, review the broader market-structure guide, the distinction between a point of interest and an entry signal, and the role of price action in confirmation. The Alchemist sequence organizes those concepts; it does not replace them.
The four questions: storyline, POI, trigger, invalidation
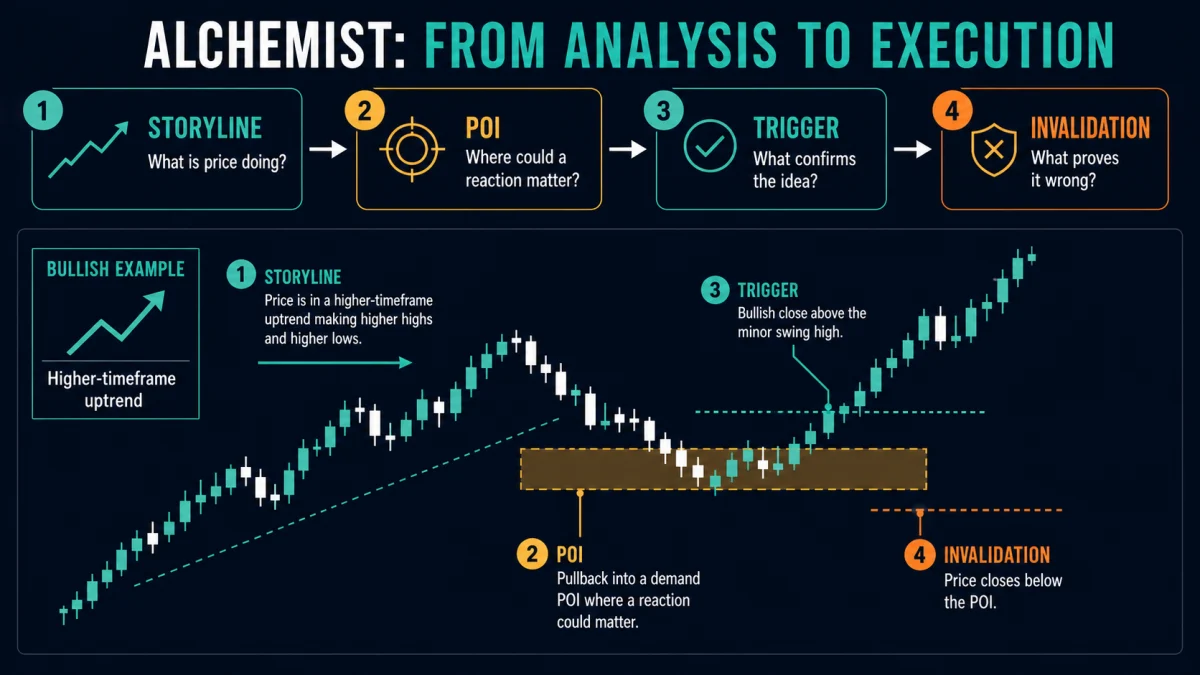
Storyline is a concise description of observable price behavior. Examples include “D1 is ranging, H4 is making lower highs, and price is approaching prior resistance” or “D1 is trending up, but H1 is pulling back into a fresh RBS zone.” Avoid writing “buyers are in control” unless you define the candles and swings that support that statement.
POI is the location where the next decision could matter. It may be a support or resistance zone, a role-reversal area, a prior swing, or another pre-defined level. A useful POI has a reason, a boundary, and a relationship to higher-timeframe structure. Five rectangles drawn after the fact are not five valid opportunities.
Trigger is the observable behavior required before execution: a close back through a level, a rejection followed by a minor structure break, or a failed retest. Invalidation states what proves the specific idea wrong. These two elements stop a trader from entering because price merely touched a colored zone.
Build a conditional narrative, not a prediction
A good narrative contains at least two branches. For example: if H1 closes back above the demand POI and breaks the most recent lower high, the bullish scenario becomes active. If H1 closes below the distal boundary and holds, the bullish scenario is cancelled. The second branch prevents attachment to the first idea.
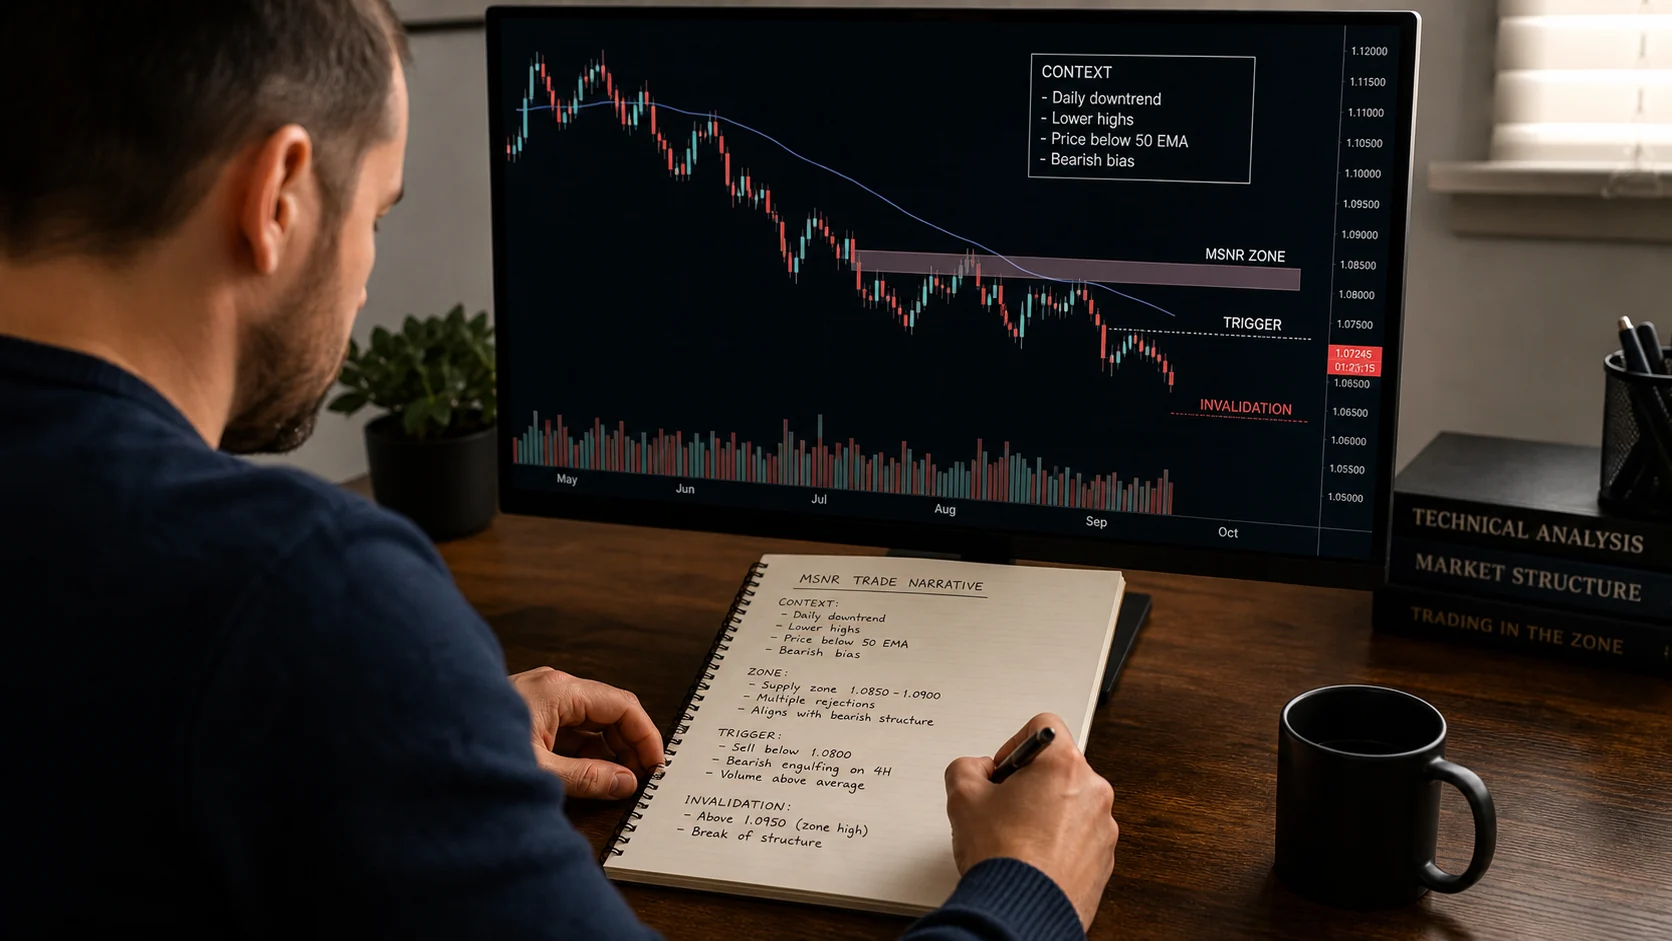
The existing guide to an MSNR trade narrative provides a more detailed narrative template. The Alchemist version adds a fixed order: context first, location second, evidence third, failure condition fourth. Execution remains optional.
Write the scenario before price reaches the POI. If the storyline is created after the move, it becomes an explanation rather than a test. That distinction matters for both learning and honest backtesting.
Step-by-step workflow
- Read D1 or the chosen context timeframe and label trend, range, or transition.
- Mark no more than the clearest higher-timeframe POIs before the session.
- Describe how price is approaching each POI.
- Write a bullish branch, a bearish branch, and a no-trade condition.
- Define the exact candle-close or structure event that activates a branch.
- Mark invalidation and the next obstacle.
- Calculate size only after the stop distance is known.
- Take the trade only if the written branch occurs; otherwise record no trade.
The four-stage Alchemist worksheet
| Stage | Question | Evidence | Output |
|---|---|---|---|
| Storyline | What is price doing? | Swings, closes, trend or range | One factual sentence |
| POI | Where could a decision matter? | HTF zone, role reversal, prior swing | Bounded area |
| Trigger | What activates the scenario? | Reclaim, rejection, close, structure break | Observable event |
| Invalidation | What proves it wrong? | Close or structure failure | Predefined exit condition |
A stage is incomplete when its answer depends on a feeling rather than an observable chart condition.
Worked chart scenario
Assume D1 remains in an uptrend, while H4 pulls back toward a fresh RBS zone. The storyline is bullish context with a corrective decline. The POI is the H4 zone, not the current market price.
On H1, price wicks below the proximal edge, closes back above the zone, and then closes above the latest minor swing high. That sequence activates the bullish branch. The invalidation is below the structure that confirmed the reclaim; the next H4 swing high is the first obstacle.
If H1 instead closes below the distal boundary and the next candle accepts below it, the bullish branch is cancelled. A short is not automatic because it needs its own context and trigger. The correct record may be “long invalidated, no trade.”
From analysis to execution without skipping a stage
Skipping from storyline to entry is the most common failure. A bullish higher timeframe does not make every lower-timeframe pullback a buy. The POI may be in the middle of a range, the approach may consume the zone, or the trigger may never appear. A complete process is allowed to end with “no trade.”
Similarly, a valid trigger at a poor location has weak context. A lower-timeframe bullish engulfing candle in the middle of congestion is different from the same close after a sweep and reclaim at a pre-marked support zone. The chart pattern is only one part of the evidence.
Finally, do not move invalidation because the position is uncomfortable. If the original failure condition occurs, the original scenario is over. Any new trade requires a new storyline, POI, trigger, and risk calculation.
Common mistakes
- Treating Alchemist as a standardized or scientifically validated system.
- Writing only the preferred directional scenario.
- Calling every colored rectangle a POI.
- Using a candle pattern without location or structure.
- Moving invalidation after entry.
- Calculating size before defining the technical stop.
The framework improves discipline only when every label is operational. Vague words such as strong, clean, or manipulation must be tied to visible rules.
Risk management and invalidation
Invalidation should match the idea. A reclaim setup may fail when price closes back through the reclaimed zone and breaks the confirming swing. A role-reversal setup may fail when price accepts on the original side. The stop order may be placed beyond that level with an execution buffer, but the analytical invalidation and order mechanics should be recorded separately.
A technical location never determines position size by itself. First define the price behavior that proves the scenario wrong, measure the distance to that point, and only then apply the position-sizing formula. The risk–reward ratio is a planning constraint, not evidence that price is likely to reach the target. If coherent invalidation is too far for the permitted risk, reduce size or skip the trade.
Execution can differ from the chart. Spread, slippage, gaps, news, data-feed differences, and order type can change the result. The CFTC warns that leverage amplifies both gains and losses and that OTC forex customers trade through a dealer-controlled platform. A valid observation can still lead to a losing trade or poor fill.
Pre-trade checklist
- Storyline is factual and time-stamped.
- POI was marked before the reaction.
- Both directional branches are written.
- Trigger uses a completed candle or defined event.
- Invalidation and next obstacle are visible.
- Risk remains within the written plan.
How to test the method without hindsight
Test the four-stage process as one model. Do not select a different trigger after each chart. Freeze the context timeframe, POI definition, confirmation rule, invalidation rule, and session before collecting samples.
- Choose one instrument and session.
- Write the four questions before replaying price.
- Advance one candle at a time.
- Record activated, invalidated, and no-trade branches.
- Include spread and realistic entry delay.
- Review whether errors came from analysis, execution, or risk.
Save one screenshot before the decision point and another after the scenario is complete. Record the instrument, session, timeframe, data feed, context, zone definition, trigger, invalidation, next obstacle, spread, slippage, maximum adverse excursion, maximum favorable excursion, and whether the order could realistically have been filled. Keep failed and ambiguous examples; deleting them creates survivorship bias.
Score process separately from outcome. A profitable trade outside the written rules is poor process, while a losing trade that followed a tested plan can remain a valid sample. Use the same definitions for at least 30–50 examples before changing a rule. When a rule changes, date the revision and begin a separate dataset.
When to stand aside
Stand aside when the higher timeframe is unclear, several POIs overlap, the zone has been repeatedly tested, or price has already moved far beyond the planned trigger. An unclear chart is not improved by inventing a more detailed story.
Skip execution when the trigger appears but coherent invalidation is beyond the allowed risk, the next obstacle leaves insufficient space, or scheduled news makes the assumed fill unrealistic. A framework is a filter, not an obligation to trade.
Frequently asked questions
Is Alchemist an indicator?
No. In this guide it is a four-stage planning framework, not a calculated indicator.
Does the framework predict direction?
No. It organizes conditional scenarios and failure conditions.
Can I use it with MSNR?
Yes. MSNR zones can supply the POI, while price behavior supplies the trigger and invalidation.
How many POIs should I mark?
There is no universal number. Mark only areas justified by your rules and keep the chart readable.
Is a zone touch enough to enter?
No. This version of the framework requires a pre-defined trigger unless a separately tested limit-entry model is being used.
Conclusion
The Alchemist framework is useful when it converts a chart opinion into four testable answers. Storyline provides context, POI provides location, trigger provides evidence, and invalidation defines failure. Any missing stage is a reason to wait.
Sources and methodology limits
- CME Group — Technical Analysis, accessed August 2, 2026.
- CME Group — Support and Resistance, accessed August 2, 2026.
- CFTC — Eight Things You Should Know Before Trading Forex, accessed August 2, 2026.
No authoritative market standard for an “Alchemist trading framework” was identified. The term is therefore defined transparently in this article as an editorial workflow built from common technical-analysis concepts. The cited sources support the underlying concepts and risk context, not the branded label or profitability.
Affiliate disclosure: If you need a practice environment, you may review an Exness demo account. This is a sponsored affiliate link, and Học Làm Trader may receive a commission if you register. The link is not a recommendation to open an account. Check costs, product terms, legal availability in your jurisdiction, and suitability before using any service.
Risk warning: This article is for education and general information only. It is not investment advice, a trade signal, or an invitation to trade. Technical analysis is interpretive and can fail without warning. Leveraged trading can cause rapid losses, and past performance does not guarantee future results. Test every rule independently, include realistic costs, assess your ability to bear loss, and take responsibility for your decisions.
Related reading: Alchemist POI Selection: Location, Freshness and Risk · Alchemist If–Then Trading Plan: Build Two Scenarios