


An MSNR target should come from observable structure and an active opposing area, followed by a risk–reward check. TP1 commonly marks an internal obstacle where price may react; TP2 can reference the opposing MSNR zone on the context timeframe. Do not force a 2R or 3R take-profit when the chart does not provide enough clean distance.
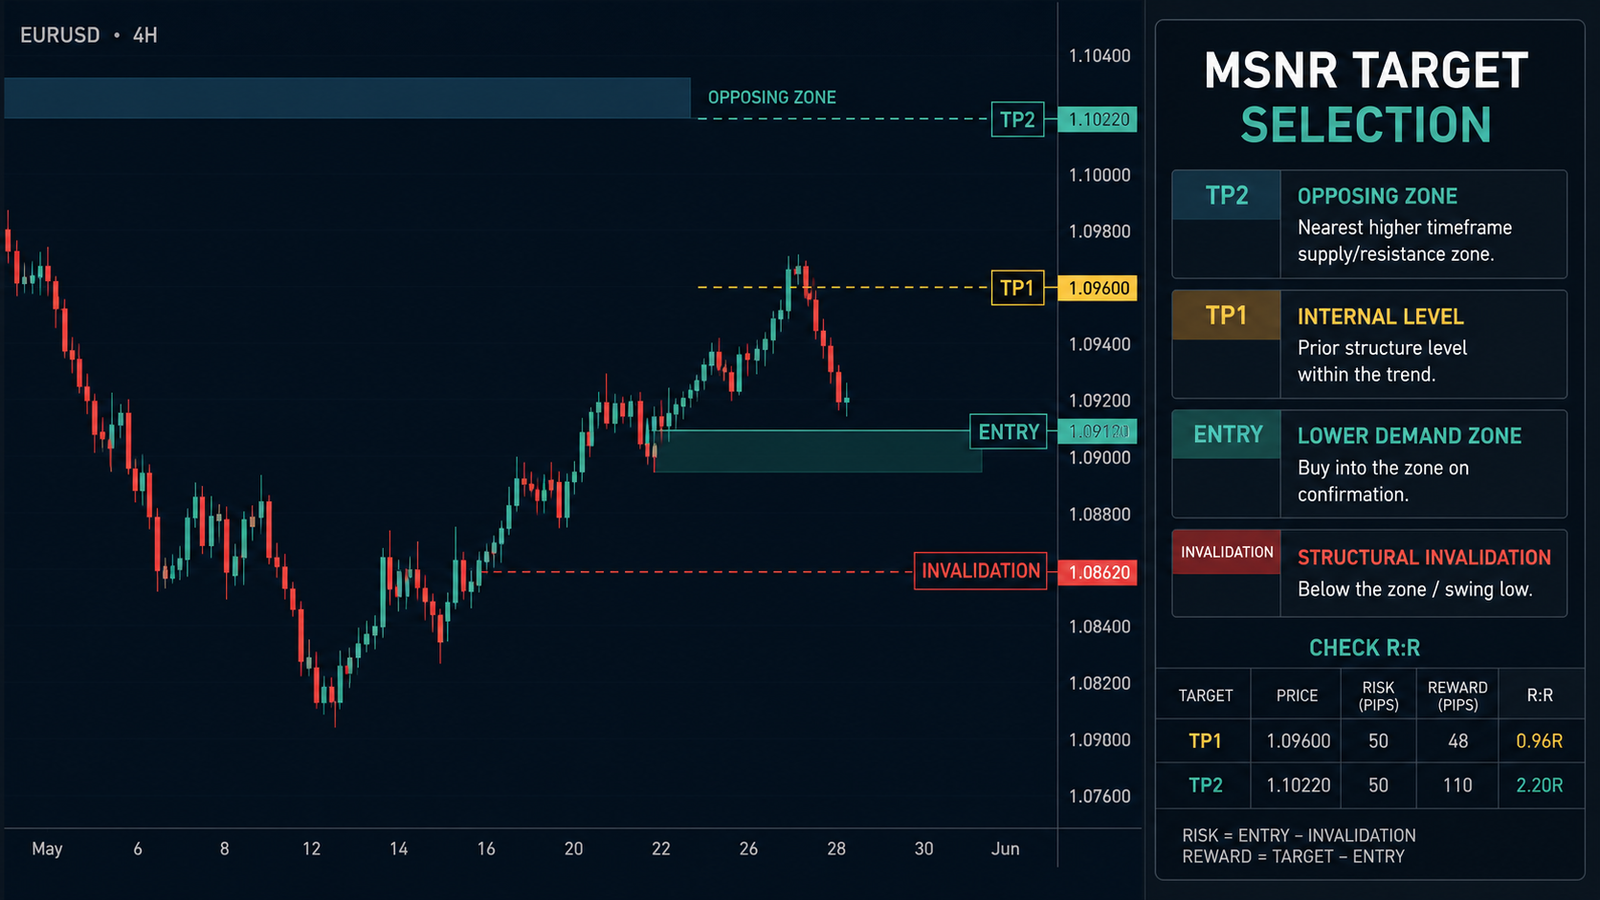
Key takeaways
- Define invalidation before calculating R:R.
- TP1 can reduce exposure; TP2 follows a defensible opposing area.
- A broken or irrelevant zone is not a valid automatic target.
- Partial exits change expectancy and require testing.
- Do not move a target farther after entry to increase hoped-for profit.
What is an MSNR target?
A target is an area where the hypothesis expects a possible reaction, liquidity interaction or opposing zone. It does not guarantee that price will arrive. A useful target has observable reasoning and matches the timeframe that created the setup.
TP1, TP2 and early exit
| Level | Role | Possible basis |
|---|---|---|
| TP1 | Reduce exposure | Internal swing or nearby reaction level |
| TP2 | Primary target | Active opposing MSNR area |
| Early exit | Respond to thesis deterioration | Opposite acceptance or structure failure |
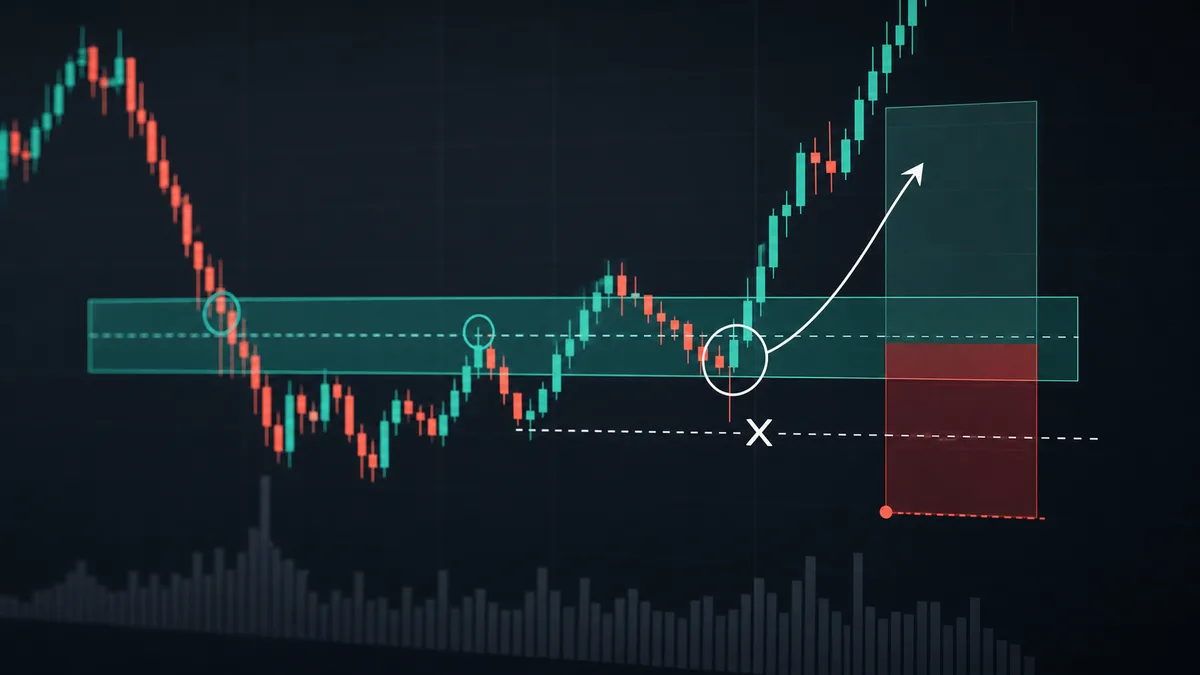
Target-selection workflow
- Record entry and structural invalidation.
- Mark internal swings between entry and the opposing area.
- Classify the opposing area as fresh, tested or broken.
- Measure risk from entry to invalidation.
- Measure reward to TP1 and TP2.
- Reject the setup if usable reward violates tested rules.
- Document partial-exit rules before entry.
When the opposing zone is not a target
If the area was accepted through, is outdated or belongs to a different structural context, keeping it as TP may be arbitrary. Conversely, a nearby fresh area can cap reward even when the long-term chart appears open.
Clean space to target
Inspect barriers between entry and TP: internal swings, range boundaries, tested levels and important opens. A distant TP2 with a major TP1 obstacle is different from an unobstructed path and should be modeled separately.
Hypothetical example
Price reacts at H4 support, an M15 long trigger appears and invalidation sits below the area. The nearest internal swing offers about 1R for TP1, while opposing H4 resistance offers about 2.4R for TP2. The plan may reduce part at TP1 and hold the remainder only while structure advances. If the H4 resistance was already broken, TP2 must be reassessed.
Fixed R versus structural targets
A fixed R is easy to measure but can ignore context. Structural targets reflect the chart but need consistent definitions. One combined approach accepts only setups where the structural area also provides the tested minimum R:R. Never edit targets after the outcome to improve historical statistics.
Partial exits and expectancy
Closing 50% at 1R and 50% at 3R is not equal to a full position reaching 3R. The journal must weight each portion and include spread, commission and slippage. A break-even rule after TP1 also needs testing because it can remove trades before continuation.
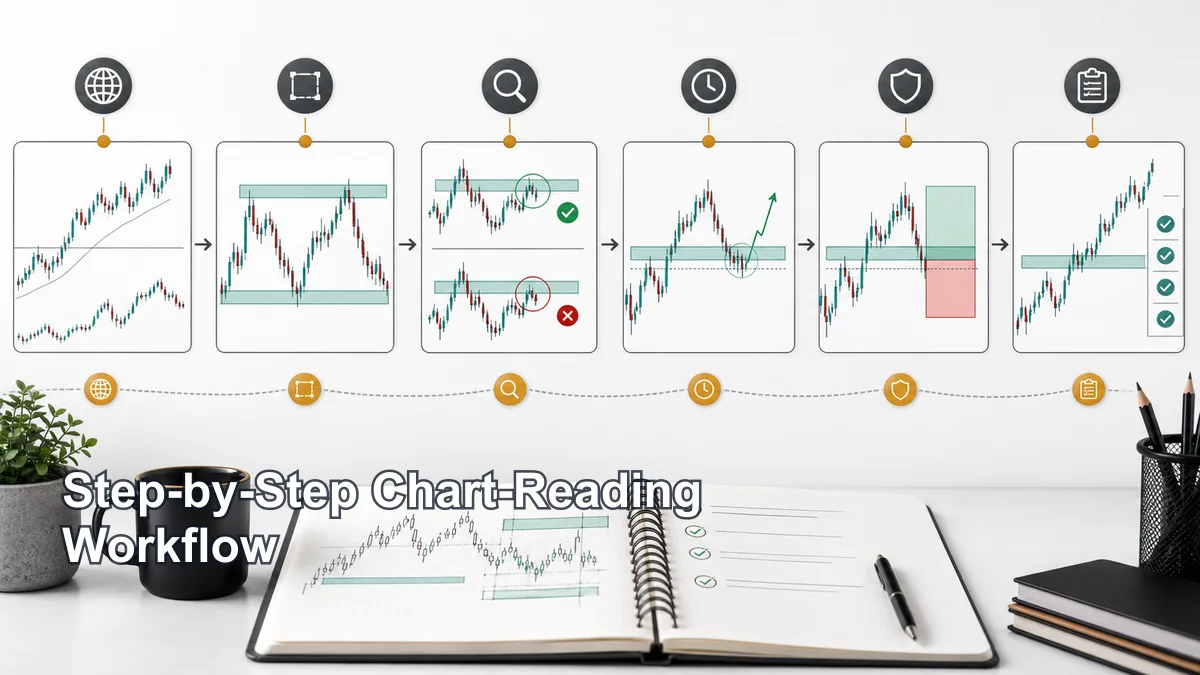
Common mistakes
- Setting TP from desired money.
- Demanding 3R when the opposing area allows 1.4R.
- Ignoring internal barriers.
- Moving TP farther from greed.
- Taking partials emotionally.
- Ignoring costs in R:R.
Checklist
- Structural invalidation?
- TP1 and TP2 defined before entry?
- Opposing area still active?
- Internal barriers reviewed?
- R:R after costs acceptable?
- Partial percentages tested?
When price does not reach the target
A setup can move correctly and reverse before TP1. This does not automatically prove that the target was wrong. Review whether price reacted at a barrier documented before entry or at a level discovered only after the outcome. Repeated failure at the same type of internal swing can motivate a new test version, but historical records should remain unchanged.
ATR can support but not replace structure
ATR describes average range and can flag a target that is unusually distant relative to recent movement. It does not identify the opposing zone and cannot predict that price will travel a fixed multiple. If ATR is a filter, lock its period, timeframe and calculation before testing.
Gap and slippage risk
Take-profit and stop orders do not guarantee an exact fill during rapid movement. Spread expansion and gaps can reduce realized reward. Instruments with trading pauses require separate gap assumptions. Do not increase position size merely because the chart shows an attractive theoretical R:R.
Target journal fields
- Entry, invalidation and price risk.
- TP1, TP2 and structural reasoning.
- Opposing-zone state.
- Percentage closed at each level.
- Actual fill and costs.
- Maximum favorable excursion.
- Any predefined early-exit reason.
Cannibalization boundary
This article answers where a target comes from. It does not replace the separate MSNR trade-management process, which answers how the position is reduced or trailed after entry. Keeping those intents separate prevents target selection from becoming an untestable collection of exit decisions.
FAQ
Should TP be a line or zone?
Treat it as a reaction area and place execution according to tested rules.
Must TP2 use the opposing zone?
No. It must remain relevant to the current timeframe and structure.
Should every trade take a partial?
Only when data supports the effect on expectancy and execution quality.
What R:R is best?
There is no universal number. It interacts with probability, costs and the exact rules.
Sources and verification
- TradingView: sessions and IANA time zones
- CME Group: trade and risk management
- CFTC: retail Forex risk advisory
Continue the cluster: MSNR hub, MSNR definition, chart setup, timeframes for drawing MSNR levels, fresh versus tested MSNR levels, daily bias, MSNR breakout versus fakeout and TradingView alerts.
Demo practice: You may review Exness platforms and demo-account options before considering a live account.
Affiliate disclosure: Học Làm Trader may receive compensation if you register through this link. This is not a recommendation to open an account.
Risk notice: This content is educational, not investment advice or a trading signal. Trading can cause capital loss. Examples are hypothetical, and past performance does not guarantee future results.
Pingback: ICT Trading Concepts: Structure, Liquidity And Risk
Pingback: Technical Indicators: Types, Formulas And Practical Use
Pingback: ATR Trailing Stop: Adapting Exit Distance To Volatility