


Malaysian support and resistance Malaysian support and resistance is the zone framework commonly abbreviated as MSNR, using structured price areas rather than arbitrary single lines. This foundation explains zone logic; the separate MSNR strategy pillar covers the end-to-end trading workflow. The method should be treated as a testable chart-reading framework rather than a forecast. Before using it, define the market condition, confirmation event, invalidation price, transaction costs and maximum risk. This guide explains the rules, a repeatable workflow, common failure modes and the most relevant supporting concepts.
What Malaysian Support and Resistance Means in MSNR
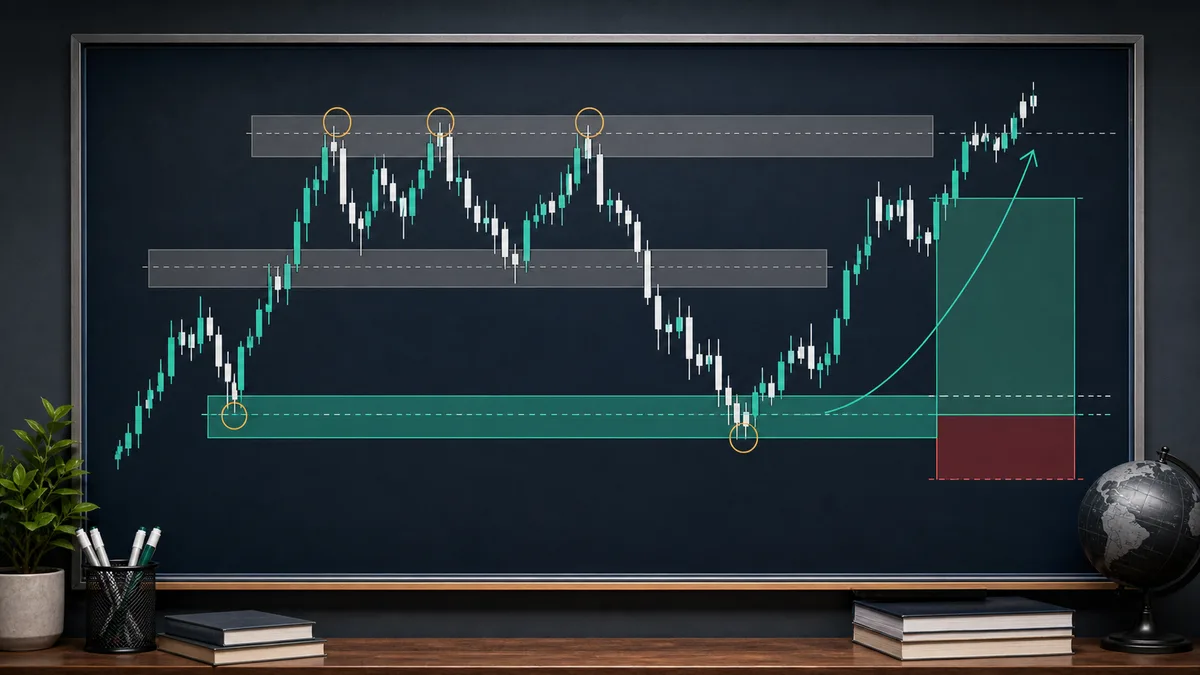
At its foundation, Malaysian Support and Resistance is still support and resistance. Support is an area where price has previously found buying interest or demand strong enough to slow a decline. Resistance is an area where price has previously found selling interest or supply strong enough to slow a rally. The difference is how the trader defines and filters those areas.
In a basic support and resistance approach, traders often draw a line at a swing high, swing low, wick, or candle close. That can be helpful for a quick view, but price rarely respects a single exact pixel. Markets move through zones. Spreads, volatility, liquidity, stop orders, and different participant behavior can make price overshoot or undershoot a line before reacting.
MSNR treats important areas as working zones. A zone may come from the close-open structure of candles near a reaction area, a strong rejection area, a base before an impulse, or another clearly visible decision zone. The goal is not to draw the most lines. The goal is to mark the few zones where price behavior could become meaningful.
The phrase “close-open level” is important in many MSNR discussions. Instead of relying only on the extreme wick, the trader studies where candle bodies open and close around the reaction area. Candle bodies can show where the market accepted or rejected price during that period. Wicks can still matter, but MSNR traders often use body structure to define a more practical zone rather than a fragile line.
Another important idea is freshness. A fresh level is a zone that has not been revisited many times after it was created. An unfresh level has already been tested or traded through repeatedly. Freshness does not make a zone guaranteed, and an old level can still be important on a higher timeframe. But as a practical filter, freshness helps traders avoid assuming every historical reaction area still has the same quality.
Malaysian Support and Resistance also depends on context. A support zone inside an uptrend is not the same as a support zone inside a weak range. A resistance zone near a higher-timeframe supply area is not the same as a small intraday line in the middle of price noise. The framework works best when the trader combines zone quality with market structure, timeframe alignment, and risk planning.
A simple way to define MSNR is this: it is a support and resistance trading method that turns broad chart reactions into filtered zones, then asks whether price behavior, freshness, and invalidation support a trade idea. It does not predict the future with certainty. It helps the trader decide whether a zone is worth attention.
Why It Matters Before Taking a Trade
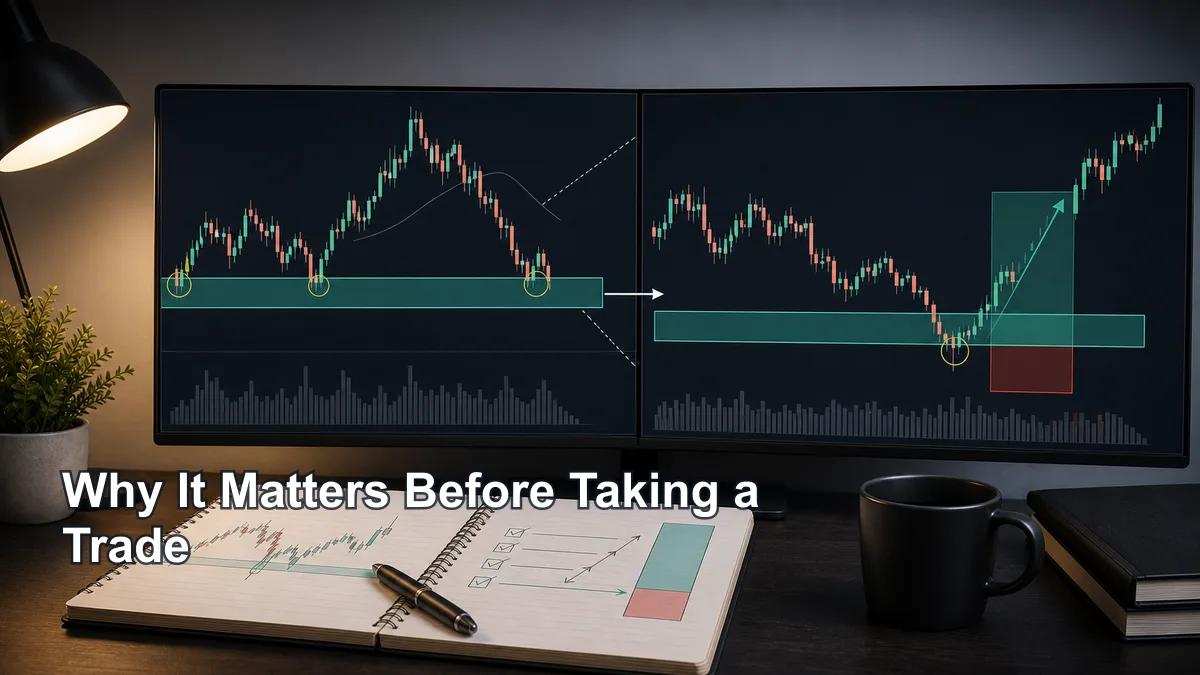
Malaysian Support and Resistance matters before a trade because the quality of the level affects the quality of the decision. A trader who enters only because price touched a line may not know whether the area is strong, weak, fresh, exhausted, or aligned with the higher timeframe. That creates emotional trading. The trader reacts first and explains later.
MSNR encourages the opposite sequence. The trader studies the broader context first, marks the cleanest zones, waits for price to approach a meaningful area, and then looks for behavior that supports or rejects the idea. The trade is not taken because the zone exists. The trade is considered only if the zone, reaction, trigger, and risk all make sense together.
This matters for support and resistance trading because many losing habits start before entry. A trader may draw too many levels, choose a weak level, ignore the dominant trend, enter before confirmation, or place a stop loss where the idea is not actually invalid. Once the trade is open, emotions increase. It is much easier to make clear decisions before money is at risk.
A structured MSNR process can help in three practical ways.
First, it reduces chart clutter. If the framework forces you to choose only the cleanest zones, you stop treating every historical candle reaction as tradable. This can improve focus and make reviews easier.
Second, it improves trade location. A trader who waits for price to reach a meaningful zone may avoid chasing candles in the middle of a move. Location does not guarantee success, but poor location often creates bad risk-reward and unclear invalidation.
Third, it makes risk visible. MSNR is useful only when it tells you where the idea is wrong. If price must hold a fresh support zone for a long setup, then a decisive break below that zone may invalidate the idea. If price must reject a resistance zone for a short setup, then acceptance above that zone may invalidate the idea. This is the bridge between analysis and risk management trading.
MSNR also matters because it helps traders separate a chart area from a trade setup. A support zone is not automatically a buy. A resistance zone is not automatically a sell. The zone is only the location. The setup needs behavior. The trade needs entry rules. The risk plan needs invalidation and position sizing.
For a broader foundation, you can connect this guide with price action trading because MSNR depends on structure, candle behavior, and reaction around levels. You can also compare it with smart money concepts if you study liquidity, market structure, and reaction zones. The goal is not to collect labels. The goal is to make better decisions with cleaner rules.
Step-by-Step Chart-Reading Workflow
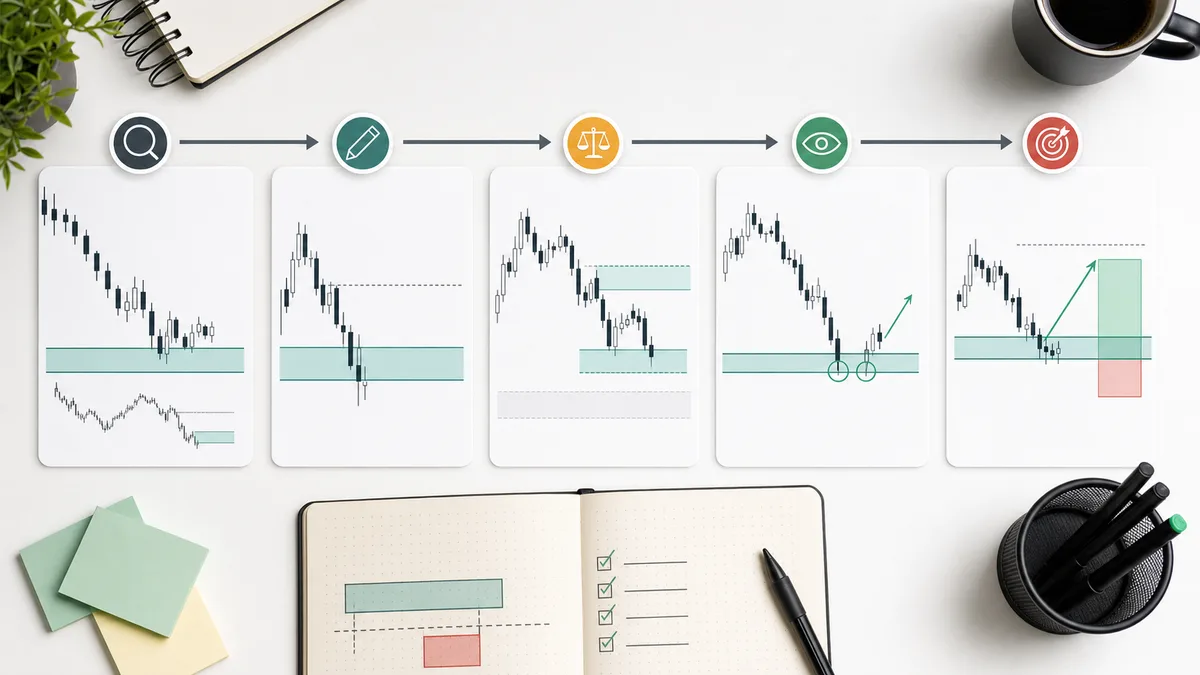
The best way to learn Malaysian Support and Resistance is to turn it into a repeatable workflow. A workflow does not remove uncertainty. It simply gives you a sequence to follow so you are not making decisions from impulse.
Step 1: Choose the trading timeframe and higher timeframe. If you plan entries on a 15-minute chart, you may use the 1-hour or 4-hour chart for context. If you plan entries on the 1-hour chart, you may study the 4-hour and daily chart first. The exact combination depends on your trading style, but the principle is clear: do not mark a lower-timeframe MSNR zone without knowing the broader environment.
Step 2: Identify market condition. Decide whether price is trending, ranging, compressing, expanding, or transitioning. Support and resistance behave differently in different conditions. In a strong trend, resistance may break more easily and support may hold more often during pullbacks. In a range, both sides may react until the range fails. In a transition, levels may become less reliable because the market is changing character.
Step 3: Mark the major decision zones first. Start with the obvious areas. Look for zones where price made a strong reaction, launched an impulse, rejected sharply, or repeatedly failed to accept beyond an area. Avoid marking small internal pauses unless they connect to the bigger context. If the level is not obvious at a normal zoom level, it may not be a priority.
Step 4: Refine the zone with close-open logic. After identifying a broad area, study the candle bodies around the reaction. Where did price open and close before the move? Did the body structure create a clean area? Is the wick extreme important, or is the body zone more practical? MSNR does not require ignoring wicks, but it tries to avoid treating one exact wick as the whole level.
Step 5: Judge fresh versus unfresh levels. A fresh zone has not been heavily retested. An unfresh zone has already been touched, weakened, or consumed several times. This filter helps you avoid trading stale areas just because they once worked. However, do not use freshness blindly. A higher-timeframe level may still matter after several interactions if the market continues to respect it structurally.
Step 6: Watch how price approaches the zone. The approach matters. A slow corrective pullback into a support zone may be different from an aggressive sell-off into the same zone. A controlled rally into resistance may be different from a high-momentum breakout. Study speed, candle size, wick behavior, and whether price is showing exhaustion or strength.
Step 7: Wait for a trigger. The trigger may be a rejection candle, lower-timeframe structure shift, failed breakout, breakout retest, or another tested rule. The key is consistency. If every trade uses a different trigger, your review will not be useful.
Step 8: Define invalidation and risk before entry. The trade idea must have a point where it is wrong. If the setup cannot define invalidation, skip it. After invalidation is clear, calculate position size and decide whether the trade risk is acceptable. If the risk is too large, the setup may not fit your plan even if the zone looks clean.
Step 9: Review the setup after the trade. A good review includes screenshots, zone reason, freshness, timeframe context, entry trigger, stop-loss placement, outcome, and notes about whether the rules were followed. This creates data. Without review, a trader cannot know whether MSNR is helping or simply adding another label to the chart.
This workflow is intentionally strict. The purpose is to prevent random support and resistance trading from hiding behind MSNR terminology. A clean process is easier to test, easier to improve, and easier to abandon if the data does not support it.
Entry, Invalidation and Stop-Loss Logic
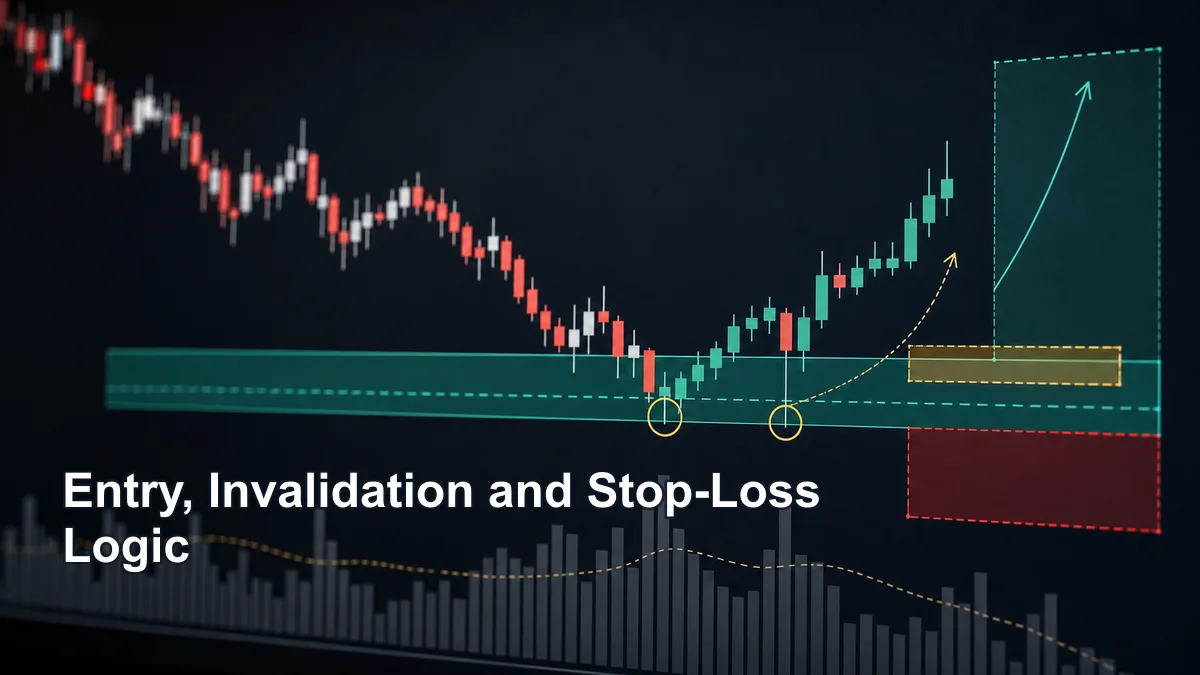
Entry is the most tempting part of trading, but in Malaysian Support and Resistance, entry should come after zone quality and invalidation. The zone tells you where to pay attention. The trigger tells you when the idea may be active. The invalidation point tells you where the idea has failed. All three are needed.
A common beginner mistake is to treat the zone as the trigger. Price touches support, so the trader buys. Price touches resistance, so the trader sells. This can sometimes work, but it is difficult to review because the entry rule is vague. Did the trader enter because of the first touch, the close, the wick, the lower-timeframe reaction, or fear of missing the move? A vague entry creates vague feedback.
A more structured MSNR entry might require price to reach a fresh zone, show rejection, and then create a lower-timeframe signal that confirms the reaction. For a long idea, that may look like a support zone holding, a failed break below the zone, or a small structure shift upward. For a short idea, it may look like resistance holding, a failed break above the zone, or a small structure shift downward. These are examples, not instructions to trade.
Invalidation should be defined before the entry. For a long setup from support, invalidation may be a clean break below the zone, below the reaction low, or below a structural point that should hold if the idea is valid. For a short setup from resistance, invalidation may be a clean break above the zone, above the reaction high, or above the structural point that should cap price. The exact rule depends on the method being tested.
Stop-loss placement should respect invalidation. If the stop is inside normal noise, the trade may be stopped out before the idea is truly wrong. If the stop is too far away, the reward-to-risk profile may become unattractive. A stop loss is not a decoration. It is the price area where the trade hypothesis has failed or where the trader accepts that the risk must be closed.
Position sizing then connects the stop to capital risk. A wider stop does not have to mean larger monetary risk if the position size is reduced. A tighter stop does not automatically make a trade safer if it sits in a poor location. Risk management trading means the trader knows the potential loss before entry and accepts it as part of the plan.
Targets should also be realistic. Many traders focus only on entry and forget the next opposing level. A long trade from support may have limited room if resistance is close above. A short trade from resistance may have limited room if support is close below. MSNR can help with this because the same zone framework used for entries can also help identify obstacles.
Before taking any MSNR setup, ask:
- What zone is the trade based on?
- Why is this zone cleaner than nearby alternatives?
- Is the level fresh, unfresh, or still meaningful because of higher-timeframe context?
- What price behavior activates the trade idea?
- Where is the idea invalid?
- Can the position size keep the loss within the planned risk?
- Is there enough room before the next opposing zone?
If any of these questions cannot be answered clearly, the trader may not have a complete setup. Skipping unclear trades is part of discipline.
Common Mistakes and Checklist

The first common mistake is drawing too many zones. Traders often believe that more levels mean more preparation, but too many levels create confusion. If price is always touching something, the trader can justify almost any entry. A better approach is to mark fewer zones and require each one to have a clear reason.
The second mistake is confusing lines with zones. Price does not always react to the exact wick or close you selected. A trader who expects perfect line reactions may enter too early, place stops too tightly, or panic when price slightly overshoots the level. MSNR works better when the trader accepts that support and resistance are working areas, not fixed points.
The third mistake is ignoring close-open structure. Some traders mark only extremes because wicks are easy to see. Wicks matter, but candle bodies can reveal where price was accepted or rejected during the session. Close-open logic helps refine the zone and reduces the chance of using a random extreme without context.
The fourth mistake is treating every fresh level as tradable. Freshness is a filter, not a complete setup. A fresh zone in the wrong context can fail. A fresh resistance zone in a strong bullish breakout may be overrun. A fresh support zone during aggressive selling may not hold. Freshness must be combined with market condition, approach, reaction, and invalidation.
The fifth mistake is ignoring unfresh levels completely. An unfresh level may be weaker for a clean bounce setup, but it can still matter as a reference point, especially on higher timeframes. The question is not whether the level is old. The question is whether price still respects it and whether the trade idea has a clean risk plan.
The sixth mistake is entering without a trigger. If the trader buys because price is “near support,” the setup is not specific enough. A trigger creates accountability. You can later review whether the trigger appeared, whether it appeared in the right location, and whether it improved the trade sample.
The seventh mistake is moving the stop loss. A zone can look perfect and still fail. If the invalidation point is reached, moving the stop usually means the trader is no longer following the plan. This is where risk management trading becomes more important than analysis. The market does not owe any level a reaction.
The eighth mistake is learning only from screenshots that worked. Social media often shows clean examples after the move. Real trading includes failed zones, fake reactions, missed entries, spread issues, news volatility, and emotional pressure. Build your own sample size. Save charts where MSNR worked and where it failed. That is how the method becomes testable.
Use this MSNR checklist before treating a zone as actionable:
- The higher-timeframe context is clear enough to describe.
- The zone is visible without forcing the chart.
- The close-open structure supports the zone boundaries.
- The level freshness is understood, not guessed.
- The price approach into the zone is part of the decision.
- A trigger is required before entry.
- Invalidation is defined before position sizing.
- The stop loss reflects the trade idea, not emotion.
- The next opposing level leaves enough room for the plan.
- The setup will be reviewed whether it wins or loses.
CTA: Use this article as your MSNR zone framework, then continue with the English trading education hub, the price action guide, and the smart money concepts guide to connect MSNR with broader chart-reading skills.
FAQs About Malaysian Support and Resistance
What is Malaysian Support and Resistance?
Malaysian Support and Resistance is a structured support and resistance trading framework that focuses on zones, close-open levels, freshness, price reaction, and invalidation instead of random chart lines.
Is MSNR the same as normal support and resistance?
It is related, but it is more rule-based. Classic support and resistance identifies areas where price reacted before. MSNR tries to filter and refine those areas into cleaner working zones.
What is a fresh level in MSNR?
A fresh level is a zone that has not been retested heavily after its creation. Traders may watch fresh zones because the reaction may be cleaner, but freshness does not guarantee that the level will hold.
Can MSNR be used on all markets?
The concept can be studied across forex, crypto, stocks, indices, and commodities, but behavior differs by market, session, liquidity, volatility, and trading costs. Always test rules in the market you trade.
Does Malaysian Support and Resistance guarantee profitable trades?
No. MSNR is an educational chart-reading framework. Every setup can fail, so risk management, stop-loss logic, position sizing, and review are essential.
Author note: Prepared by the Hoc Lam Trader editorial team for educational use. This guide was updated on May 11, 2026. Chart concepts should be tested with historical data and demo practice before live trading, and no example should be treated as a profit promise.
Key takeaways
- Malaysian support and resistance is the zone framework commonly abbreviated as MSNR, using structured price areas rather than arbitrary single lines.
- This foundation explains zone logic; the separate MSNR strategy pillar covers the end-to-end trading workflow.
- Define how a zone is created, tested and invalidated before grading its quality.
- A valid plan separates location, trigger, invalidation, position size and exit logic.
A validation workflow you can reproduce
- Define the sample: choose the market, timeframe, session and date range before reviewing outcomes.
- Write the rule: Define how a zone is created, tested and invalidated before grading its quality.
- Record invalidation: identify the observable price event that disproves the setup.
- Include execution costs: account for spread, commission and slippage where relevant.
- Validate separately: test the finished rule on data that was not used to create it.
When this concept is unreliable
The framework is unreliable when every historical turning point is marked or a zone has no reproducible upper and lower boundary. Keep failed and skipped examples in the journal so the review is not limited to attractive winners.
Use this concept within a complete analysis
This method should remain connected to its parent framework and adjacent decision steps. Use How to Draw Malaysian SNR Levels Step by Step, How MSNR Uses Close and Open Prices Instead of Random Wick Lines, MSNR Terminology: SNR, Fresh Level, Storyline, Rejection and Confluence and MSNR Chart Setup: What Tools, Timeframes and Templates You Need to compare definitions, establish context and avoid treating one signal as a complete trading system.
References and methodology
Terminology note: SMC, ICT and MSNR terms are practitioner conventions, not standardized exchange or regulatory definitions. This article defines the convention it uses and avoids inferring participant identity from candles alone.
- CME Group — Technical Analysis
- CFTC — Eight Things to Know Before Trading Forex
- CME Group — Chart Types: Candlestick, Line and Bar
Practise before considering real capital
Use historical charts or a demo account to test the written rules before considering live execution. Review the Exness account and demo information. Availability, protections and trading conditions depend on jurisdiction, so review the applicable legal documents yourself.
Affiliate disclosure: Học Làm Trader may receive a commission if you open an account through this link, at no additional cost to you. This relationship does not determine the educational conclusions.
Risk warning: This article is for education and general information only. It is not investment advice, a trade signal or an invitation to trade. Trading can result in loss of capital, and past examples do not guarantee future results. Assess your own circumstances and risk tolerance.
Related guides in this topic
- MSNR Trading Strategy: Complete Beginner-to-Advanced Guide
- What Is MSNR Trading? Meaning, Logic and Beginner Rules
- MSNR vs Random Support and Resistance: The Key Differences
Related reading: Broken MSNR Zones: When Support or Resistance Fails · Common Support and Resistance Drawing Mistakes in MSNR