


MSNR resistance zones An MSNR resistance zone is a predefined area above or around current price where a prior reaction may justify observing for renewed supply. The zone is not proof of resting sell orders and should not be treated as an automatic short entry. The method should be treated as a testable chart-reading framework rather than a forecast. Before using it, define the market condition, confirmation event, invalidation price, transaction costs and maximum risk. This guide explains the rules, a repeatable workflow, common failure modes and the most relevant supporting concepts.
What MSNR Resistance Level Means in MSNR
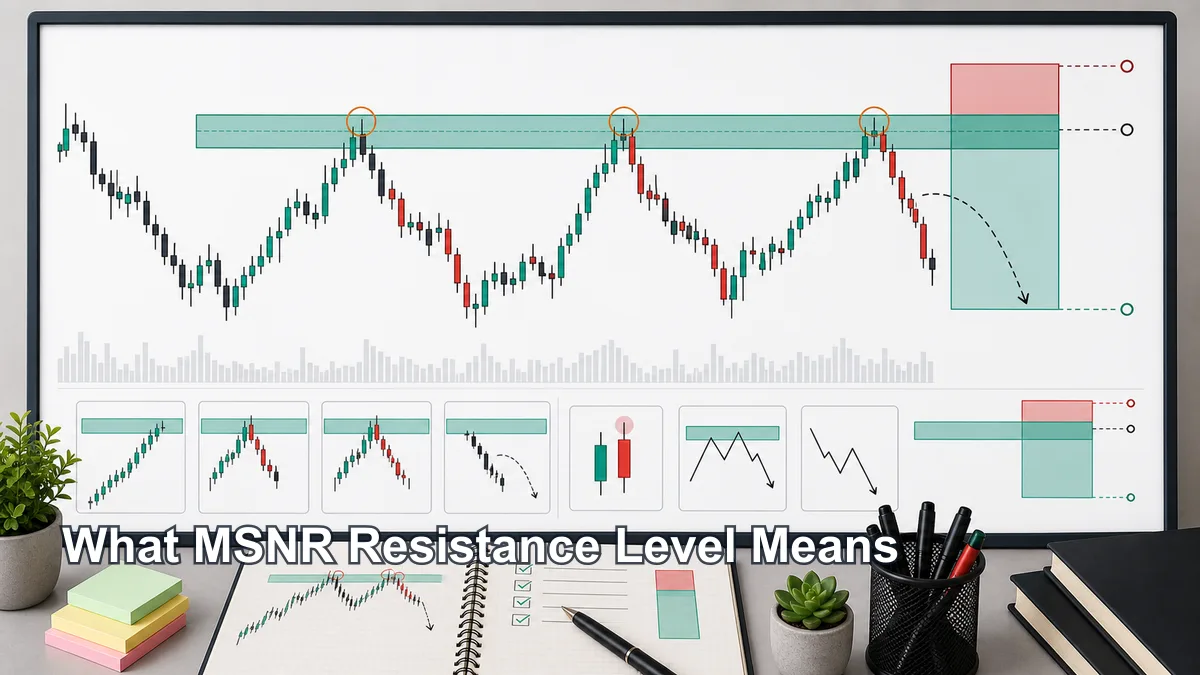
In MSNR, a resistance level is a working supply zone where price may find selling pressure. It is often drawn from a meaningful rejection area, using candle body and close-open logic rather than only the highest wick. The purpose is to identify an area where sellers previously defended price and where a future return may create a readable bearish reaction.
A basic resistance line marks a previous high. An MSNR resistance level is more selective. The trader asks whether the zone created a strong move down, whether the rejection was clear, whether the level is fresh or repeatedly tested, and whether the broader market supports a bearish idea. Without these filters, the chart can become crowded with weak resistance lines.
The phrase “supply zone” helps because it frames resistance as an area, not a single exact price. Price may push into the zone, sweep above a previous high, close back below, or retest the area before rejecting. A one-pixel resistance line is often too fragile for real market movement.
A useful MSNR resistance level often has several characteristics:
- It is visible without forcing the chart.
- It comes from a clear bearish rejection or impulse lower.
- The candle body structure helps define the zone.
- The level is not already overused by too many tests.
- Price approach into the zone can be evaluated.
- Invalidation can be placed logically above the supply zone.
None of these characteristics guarantees that the zone will hold. They simply help traders avoid treating every previous high as a short setup. In MSNR, the best resistance levels are the ones that can be explained before the move, not only after the rejection appears on the chart.
Why It Matters Before Taking a Trade
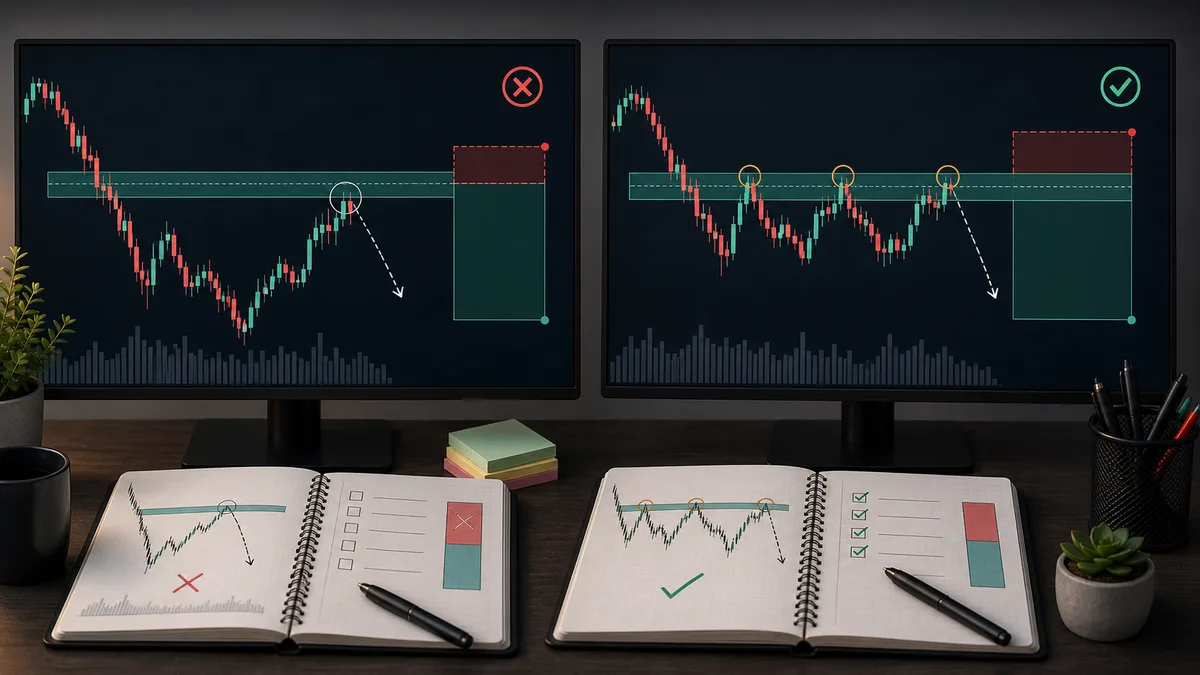
Identifying the MSNR resistance level before taking a trade matters because the level defines trade location. A short entry in the middle of a decline may feel safe after price has already moved, but it can create poor risk-to-reward. A short planned around a clean supply zone may offer clearer invalidation and better review data.
Resistance level trading becomes dangerous when the trader starts with a bearish bias and then searches for any high that justifies a short. A chart may contain many swing highs, failed rallies and wick rejections. If all of them become resistance, the trader can justify almost any sell decision.
A high-quality supply zone forces better questions:
- Where did sellers previously reject price?
- Did the reaction from the zone show real downside strength?
- Is price returning to the zone for the first time or after several tests?
- Does the higher timeframe support a bearish scenario?
- Where is the short idea wrong?
These questions help prevent emotional shorts. A resistance zone inside a clear downtrend pullback is not the same as a resistance zone fighting a strong uptrend. A supply zone that launched a strong move lower is not the same as a small pause in a bullish market. Context changes the meaning of the level.
MSNR resistance levels also matter because they define risk before entry. If a short idea depends on the supply zone holding, then a decisive break or acceptance above the zone may invalidate the setup. The stop-loss plan should be connected to that invalidation, not added randomly after entry.
The goal is not to call every top. The goal is to avoid low-quality short trades where the resistance level is weak, the market context is bullish, the rejection is missing, and risk is unclear.
A practical example is a bearish market that rallies back into a supply zone created before the last strong sell-off. If price approaches the area with weakening momentum, pushes into the zone, fails to accept higher prices and then closes back below the body area, the trader has a rejection sequence to review. If price instead breaks through the zone with strong bullish candles and holds above it, the resistance idea may be invalid before any short entry is justified.
This is why the resistance zone should be marked before price reaches it. If the trader draws resistance only after a visible drop, hindsight can make the level look cleaner than it was in real time. Marking the zone in advance forces the trader to judge whether the supply area actually behaves as expected.
Step-by-Step Chart-Reading Workflow
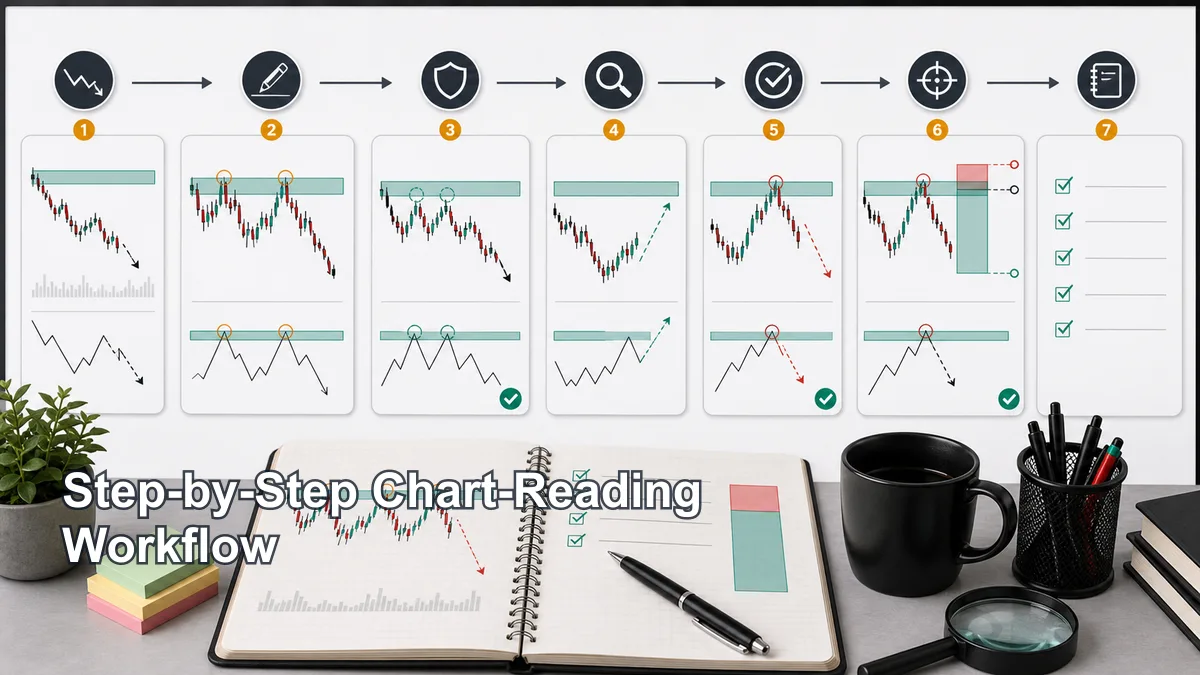
Use this workflow to identify a potential MSNR resistance level before looking for short entries. It is a study process, not a trading signal.
Step 1: Start with higher-timeframe direction. Check whether the broader market is trending down, ranging, pulling back, or breaking upward. A supply zone aligned with bearish structure is different from a supply zone trying to stop a strong bullish trend.
Step 2: Find the origin of bearish rejection. Look for the area where price stopped rising and moved away with strength. The best resistance zones often appear before a clear bearish impulse, not after a random small candle.
Step 3: Refine the zone with candle bodies. Use the open and close structure around the resistance area to define a practical zone. Wicks can show rejection or liquidity sweeps, but candle bodies often help identify where price failed to accept higher levels.
Step 4: Check freshness. Ask whether price has already returned to the supply zone several times. A fresh resistance level may offer a cleaner first test. An overused zone may still matter, but it often needs stronger confirmation or may be better used as context.
Step 5: Study the approach. How does price rally into resistance? A slow corrective pullback into supply may be easier to evaluate than a powerful breakout. If price surges into the zone with strong bullish momentum, wait for clearer rejection before considering a short idea.
Step 6: Wait for bearish rejection. The resistance zone is only the location. The trigger may be rejection, a lower-timeframe structure shift, a failed breakout, or another tested rule. Do not short only because price touched the zone.
Step 7: Define invalidation. Decide where the bearish idea is wrong. This may be above the supply zone, above the rejection high, or above a structural point that should cap price if sellers are in control.
Step 8: Review the setup. Save screenshots before and after the trade. Note the zone reason, freshness, trigger, invalidation and outcome. This creates a sample you can actually learn from.
When reviewing resistance-level examples, separate the quality of the zone from the outcome of one trade. A clean supply zone can fail during a strong bullish breakout. A messy resistance level can still reject if the broader market is weak. The useful review question is whether the zone was selected by rules, whether rejection appeared before entry, and whether risk was controlled when the idea failed.
Entry, Invalidation and Stop-Loss Logic
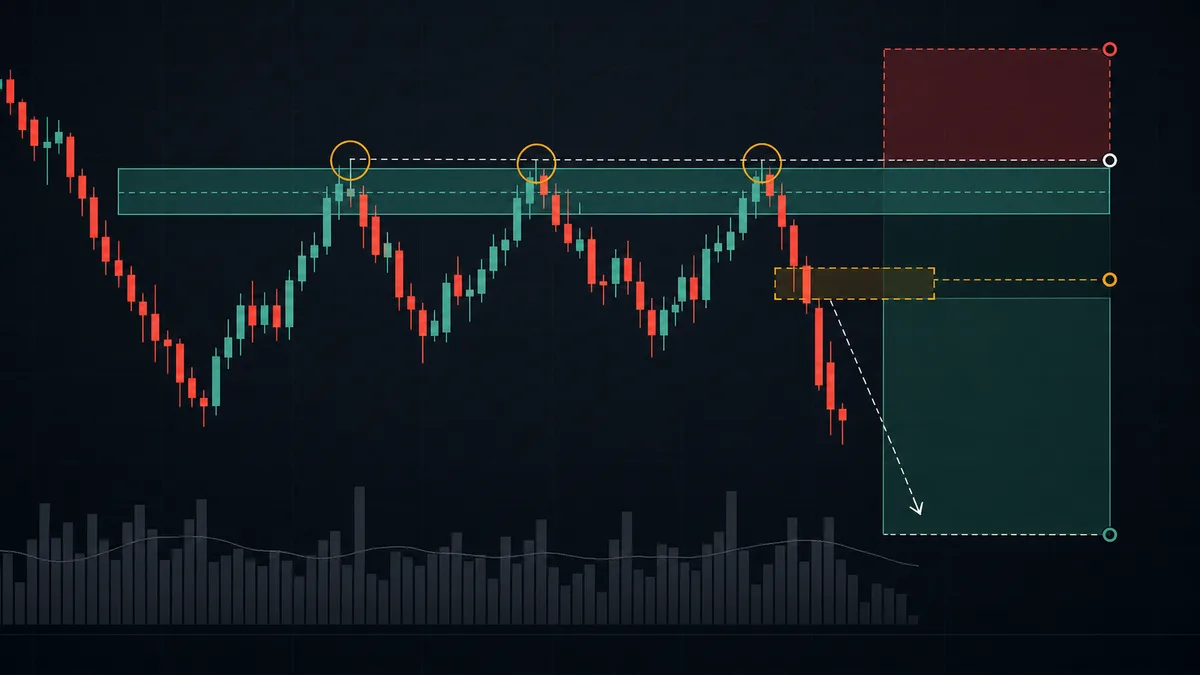
A resistance level becomes tradable only when entry logic appears. A trader who shorts the moment price touches resistance is still trading a line, not a complete plan. In MSNR, the zone gives the trader a place to watch, but rejection and trigger logic decide whether the idea is active.
For example, a trader may wait for price to enter a fresh supply zone, fail to accept higher prices, and then form a lower-timeframe bearish shift. Another trader may require a failed breakout above the zone followed by a close back below it. The exact trigger can vary, but it should be defined before the trade.
Invalidation is the key to a bearish resistance setup. If sellers are expected to defend the zone, what proves they are not defending it? Acceptance above the supply zone, a strong close through resistance, or a failure to reject may invalidate the short idea. The trader should know this before entering.
The stop loss should respect that invalidation. A stop placed too tight may be hit by normal volatility around the zone. A stop placed too wide may make the trade unattractive. The trader must connect stop placement to position size so the planned loss remains controlled if the setup fails.
A resistance setup should also have room to move. If the nearest support is directly below the entry, the reward may not justify the risk. A good resistance level is not only about where to sell. It is also about where the trade could reasonably move and where the idea is wrong.
This is especially important near major news, session opens or fast liquidity events. A supply zone may look clean, but if volatility expands sharply, price can overshoot the level before any stable rejection appears. Waiting for acceptance or rejection after the test can reduce impulsive shorts and make the stop-loss logic more defensible.
Before taking a bearish MSNR setup, ask:
- What exact supply zone is the trade based on?
- What evidence says sellers may defend this area?
- What trigger must appear before entry?
- Where is the bearish idea invalid?
- Can the position size keep the loss controlled?
- Is there enough room before the next support zone?
Common Mistakes and Checklist
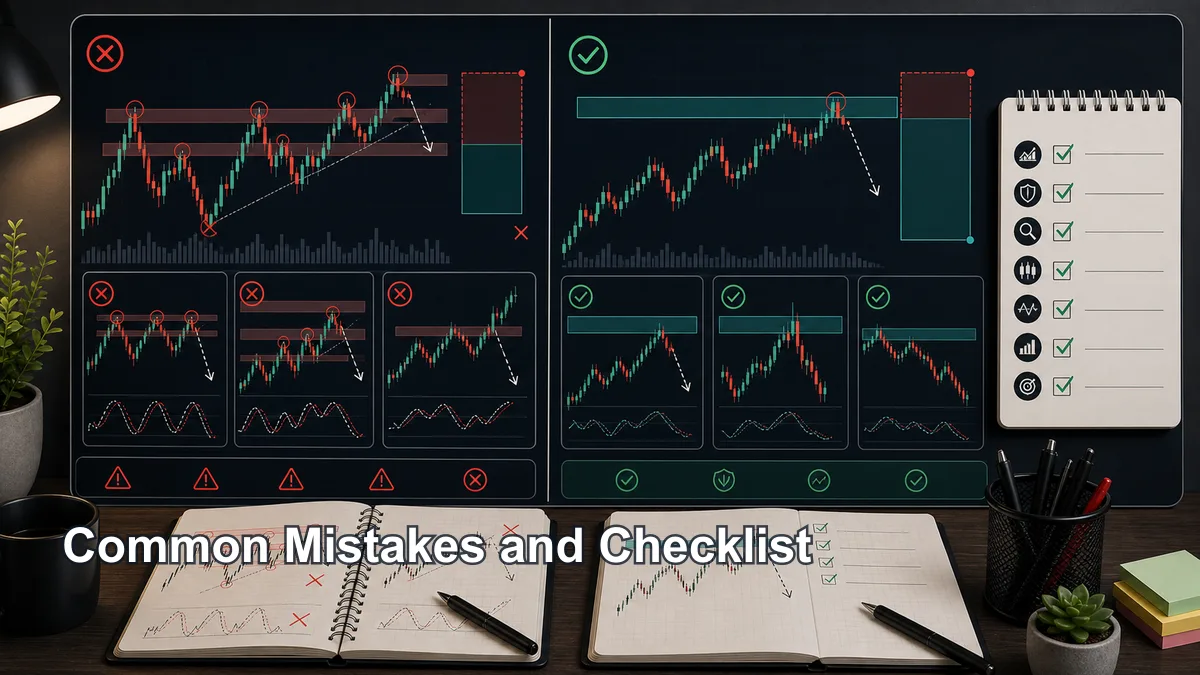
The first mistake is shorting every previous high. A previous high can be a resistance reference, but it is not automatically a high-quality MSNR resistance level. The zone needs context and rejection quality.
The second mistake is ignoring the trend. Shorting resistance in a strong uptrend can be dangerous if price is repeatedly breaking supply zones. Countertrend resistance trades require extra caution and stronger confirmation.
The third mistake is drawing too many supply zones. If the chart has several resistance zones stacked close together, the trader may not know which one matters. Focus on the cleanest levels and remove weak ones.
The fourth mistake is entering without rejection. A supply zone is not an automatic sell. Wait for price behavior that supports the bearish idea.
The fifth mistake is moving the stop above each new high. If invalidation is reached, the trade idea has failed. Moving the stop often turns a planned loss into an emotional decision.
Use this MSNR resistance checklist before planning a short trade:
- The higher-timeframe context does not clearly fight the short idea.
- The resistance level comes from a meaningful bearish reaction.
- The supply zone is drawn from clear body and close-open logic.
- The level freshness is understood.
- Price approach into the zone is evaluated.
- A bearish trigger is required before entry.
- Invalidation is defined above the resistance idea.
- Stop loss and position size are planned before entry.
- The next support zone leaves enough room for the trade plan.
CTA: To connect resistance levels with the full MSNR framework, read the Full MSNR Guide. For risk planning around failed resistance, continue with practice MSNR without risking real money.
FAQs About MSNR Resistance Levels
What is an MSNR resistance level?
An MSNR resistance level is a supply zone where price previously showed meaningful selling pressure and where a future bearish reaction may be evaluated with clear invalidation.
Is an MSNR resistance level the same as a supply zone?
They are closely related. In this context, the resistance level is treated as a working supply zone rather than a random horizontal line.
Should I short every MSNR resistance level?
No. A resistance level is only a location to watch. Entry still requires context, rejection, a trigger, invalidation and controlled risk.
Where should invalidation be for a resistance setup?
Invalidation is usually above the supply zone, above the rejection high, or above the structure that must hold for the bearish idea to remain valid. The exact rule should be tested.
Can a high-quality resistance level fail?
Yes. Any resistance level can fail. That is why every setup needs risk management and should never be treated as a guaranteed rejection.
Author note: Prepared by the Hoc Lam Trader editorial team for educational use. This guide was updated on May 11, 2026. Use screenshots, historical testing and demo practice before live trading, and treat each setup as a hypothesis rather than a promise.
Key takeaways
- An MSNR resistance zone is a predefined area above or around current price where a prior reaction may justify observing for renewed supply.
- The zone is not proof of resting sell orders and should not be treated as an automatic short entry.
- Require a reproducible origin, a meaningful departure and a separate reaction trigger before defining risk.
- A valid plan separates location, trigger, invalidation, position size and exit logic.
A validation workflow you can reproduce
- Define the sample: choose the market, timeframe, session and date range before reviewing outcomes.
- Write the rule: Require a reproducible origin, a meaningful departure and a separate reaction trigger before defining risk.
- Record invalidation: identify the observable price event that disproves the setup.
- Include execution costs: account for spread, commission and slippage where relevant.
- Validate separately: test the finished rule on data that was not used to create it.
When this concept is unreliable
Resistance analysis is unreliable when every previous high is marked or failed zones are removed from the review sample. Keep failed and skipped examples in the journal so the review is not limited to attractive winners.
Use this concept within a complete analysis
This method should remain connected to its parent framework and adjacent decision steps. Use Support Level in MSNR: How to Identify High-Quality Demand Zones, Line Chart vs Candlestick Chart for MSNR Levels, What Is MSNR Trading? Meaning, Logic and Beginner Rules, How MSNR Uses Close and Open Prices Instead of Random Wick Lines, MSNR Terminology: SNR, Fresh Level, Storyline, Rejection and Confluence and MSNR Chart Setup: What Tools, Timeframes and Templates You Need to compare definitions, establish context and avoid treating one signal as a complete trading system.
References and methodology
Terminology note: SMC, ICT and MSNR terms are practitioner conventions, not standardized exchange or regulatory definitions. This article defines the convention it uses and avoids inferring participant identity from candles alone.
- CME Group — Technical Analysis
- CFTC — Eight Things to Know Before Trading Forex
- CME Group — Chart Types: Candlestick, Line and Bar
Practise before considering real capital
Use historical charts or a demo account to test the written rules before considering live execution. Review the Exness account and demo information. Availability, protections and trading conditions depend on jurisdiction, so review the applicable legal documents yourself.
Affiliate disclosure: Học Làm Trader may receive a commission if you open an account through this link, at no additional cost to you. This relationship does not determine the educational conclusions.
Risk warning: This article is for education and general information only. It is not investment advice, a trade signal or an invitation to trade. Trading can result in loss of capital, and past examples do not guarantee future results. Assess your own circumstances and risk tolerance.